The Edible Campus is a collaborative project of the McGill School of Architecture’s Minimum Cost Housing Group, Santropol Roulant and of course all the energetic volunteers. It was established in 2007 and has been growing year after year since. In 2011 the total yield reached one ton of produce and we harvested 30 different type of vegetables of more than 50 varieties.
In the middle of a city-Montreal, there still exists the possibility to reconnect with the natural world through gardening thus we gather to start the gardening season on the Edible Campus and aim for higher and higher yields!
We started our day on a cold spring morning; more than two dozen of young volunteers lively, energetic and full of spirits assembled around the bare Burnside plaza waiting for instructions from Tim Murphy, sustainability coordinator of Santropol Roulant.
We were ready and didn't have to wait long to get in action; setting up the Edible garden for the summer and to revive the McGill campus once again!

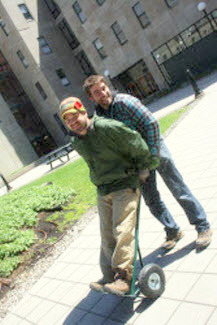
Two by two we work in groups, climb up the high steps of the staircase box on the South-West corner of the Burnside Plaza. We carry down the grey plastic containers filled with soil and water from the last season. They are heavy and balance is essential in the transporting of the bulky containers over the high wiggly concrete steps of the staircase.

The other side of the plaza, the space facing the Schulich library is taken over by another group of volunteers who are cleaning and setting up the drainage system of the containers; another group is mixing soil and planting medium in front of the staircase box. It is important to have proper drainage and good soil mix from which the plants which are grown in the self-watering containers are to thrive and flourish.
Gardening Fact: Good soil is ninety percent of the secret to a fruitful garden. Without it, you will be fighting a losing battle no matter how diligent you are with watering, weed and pest control. If the root system of plants is flooded it could damage or kill the plant. Thus, well drained and proper soil equals to a good start!

Steps to set up the semi-hydroponic (self-watering) container:
- At the bottom of the planter (the plastic container) a false bottom made form of a rigid plastic panel which is folded is inserted. This base has to be waterproof and its main function is to prevent the soil form sinking into the water. This makes sure that the soil and roots do not rot and smell. The water at the base serves as a reservoir reducing the frequency of watering of plants.
Gardening Fact: If the base is bent or flexes at any point avoid using it as it may collapse. This would lead to the soil and water mixing together and with time the root system in the soil may rot.
2. A watering pipe is inserted in the false bottom; this tube would be used to fill the bottom reservoir when watering.
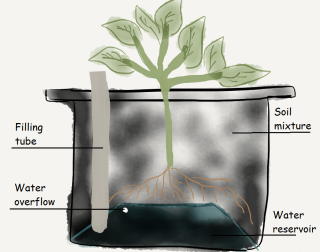
Gardening Fact: Be careful as to not pour the soil or compost through the filling tube. Also make sure that the planting medium remains at least a few inches below the top opening of the tube to prevent the tube from being buried by the soil.
4. The water seeps through the sides of the base to reach the roots of the plants and to provide them with nutrients.
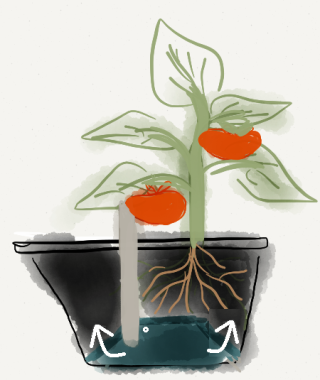
5. A hole is drilled into the container at the top of the false base so that the excess water would drain out in case of heavy rain or accidental over watering. This drainage system ensures that the plant receives optimum amount of water and nutrients thus it aids in its regulated growth.
6. The old soil needs to be enriched to be ready to sustain the new vegetation thus with bare hands and equipment the soil is mixed over and over. Large blocks of soil are loosened to provide space for the soil to hold nutrients like Nitrogen, Phosphorus and Potassium required for the vegetables to nourish and grow.
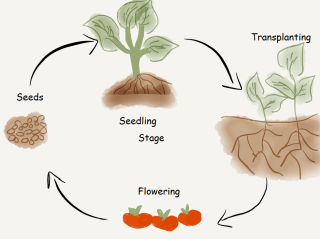
Gardening Fact: Ensure that any leftover dead roots or unwanted solid waste is removed from the soil to prevent them from decaying in the
container producing an
unpleasant odor.
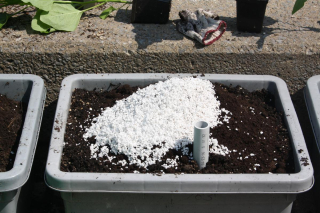
7. Nutrients are also added to the container. These include compost and organic fertilizers to provide the healthy growth of the plants and Perlite, which is a filer material that adds airiness and lightness to the soil and also keeps down the overall weight of the planter.
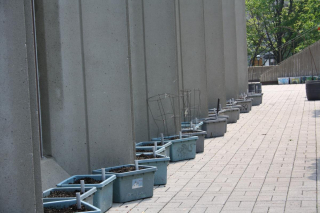
The containers were carefully set up in different locations to make use of the neglected and wasted spaces of the Burnside Plaza. This method of arranging the containers creates special zones of the garden. Along the staircase-box beans have been planted.The bush beans act as climbers that cover the bush-hammer concrete wall, softening it and creating a relaxing atmosphere in the Burnside plaza.
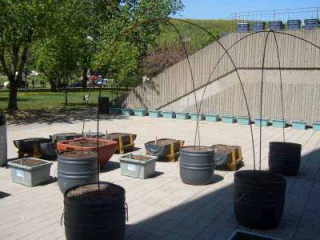
Along the North side plaza, in particular along all edges of passages and ramps, containers are aligned, energizing and livening up the movement areas of the plaza with beautiful plants.
The North-west corner is transformed into a small concentrated growing area with a passage cutting through it which will be covered over by a tunnel of plants. This tunnel will be supported by a light re-bar support trellis, which is set up in large half barrel containers.
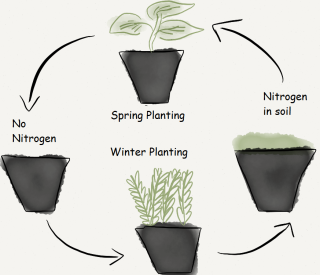
The process of crop rotation has been considered in the setting up of the garden that confers several benefits to the soil some of which includes Nitrogen fixation. Nitrogen fixation is a process that re-cycles nitrogen in the air and provides it as nutrients for the plants. Crop rotation also mitigates the build-up of pathogens and pests and thus allows the Edible Campus to be free of the use of pesticides-
An Organic Garden!
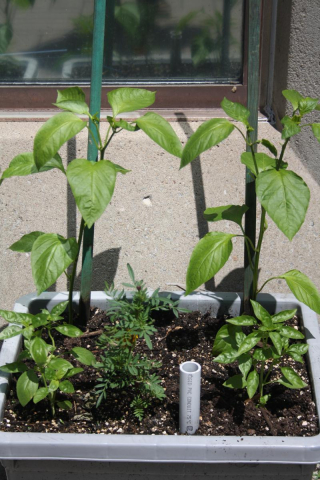
Likewise, the process of intercropping is seen as a good example on the Edible Campus where there is a synergy of plants as they assist each other. Two or more crops are grown in close proximity which allows the most efficient use of space and increases the yield. For instance basil and beans have been planted in the same container; this makes use of resources that would otherwise have not been utilized by a single crop. Moreover, the beans are climbers and the basil is a shorter plant thus careful planning has been made to ensure that the two plants do not compete for nutrients and light.
The Edible Campus may seem to be bare for the moment, however not too long before the seeds start to sprout and the bright colors erupt all over the campus.